Reclaimed Wood Beams

Reclaimed barn beams are so the rage right now. Everyone wants them, but they are hard to find and very pricey. You can try and find these type of beams at your local salvage yard, or scavenge the rural area for old barns and see if the owner would sell them to you. An alternative is to make the beams yourself. I know, I know, "fake beams, how tacky!". Well actually you can make an amazing vintage looking beam and know one would be the wiser.
Recently I had a client that wanted a barn beam, but needed a more substantial header for a load bearing wall. The solution was to create a veneer that would wrap around the 20 ft. header to create a beam.
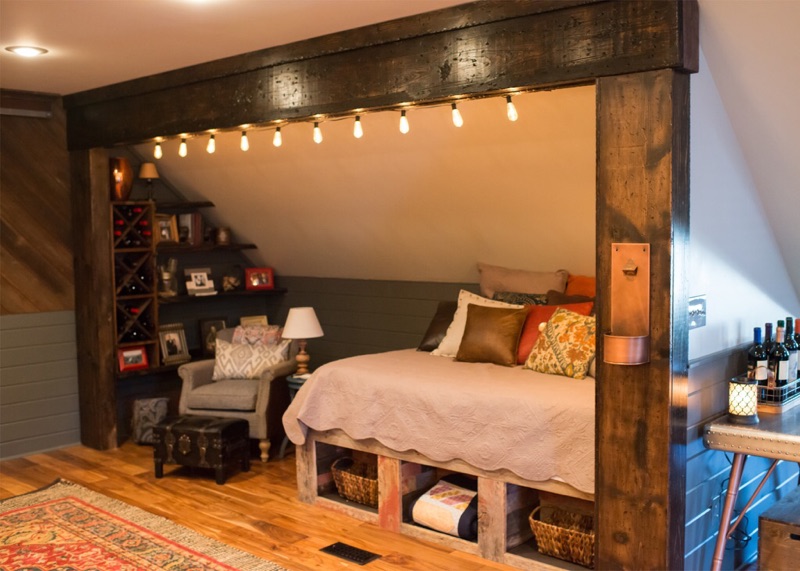
My client gave me the below picture as inspiration for what she wanted for her nook. As you can see the beam and columns are definitely the focal points in the nook. It was very important to make beautiful beams and columns that looked authentic.

The process of creating the beam and columns was a long one, but well worth it.
Ok here we go,
Creating barn beams and columns
First we bought four 20ft. pieces of pine lumber. Look for pieces with knots, holes and rough patches. These imperfections in the wood will bring lots of character.

Next open your tool box and check out what you got. I choose the items in the below picture as my tools for this project. You can use whatever you feel comfortable with and will do the job. The only tool you will deffinatly need is a hammer.

I chose a hammer, ceiling screw hook, a chain and a screw driver. I wanted these beams to look as authentic as possible. I thankfully have a few old beams thanks to Salvage Candy, a local salvage yard in Evansville. Here are some shots of a real beam so you can see what I was trying to achieve. My client wanted the beams to have more warmth and color so I didnt make the beam grey and worn in color.
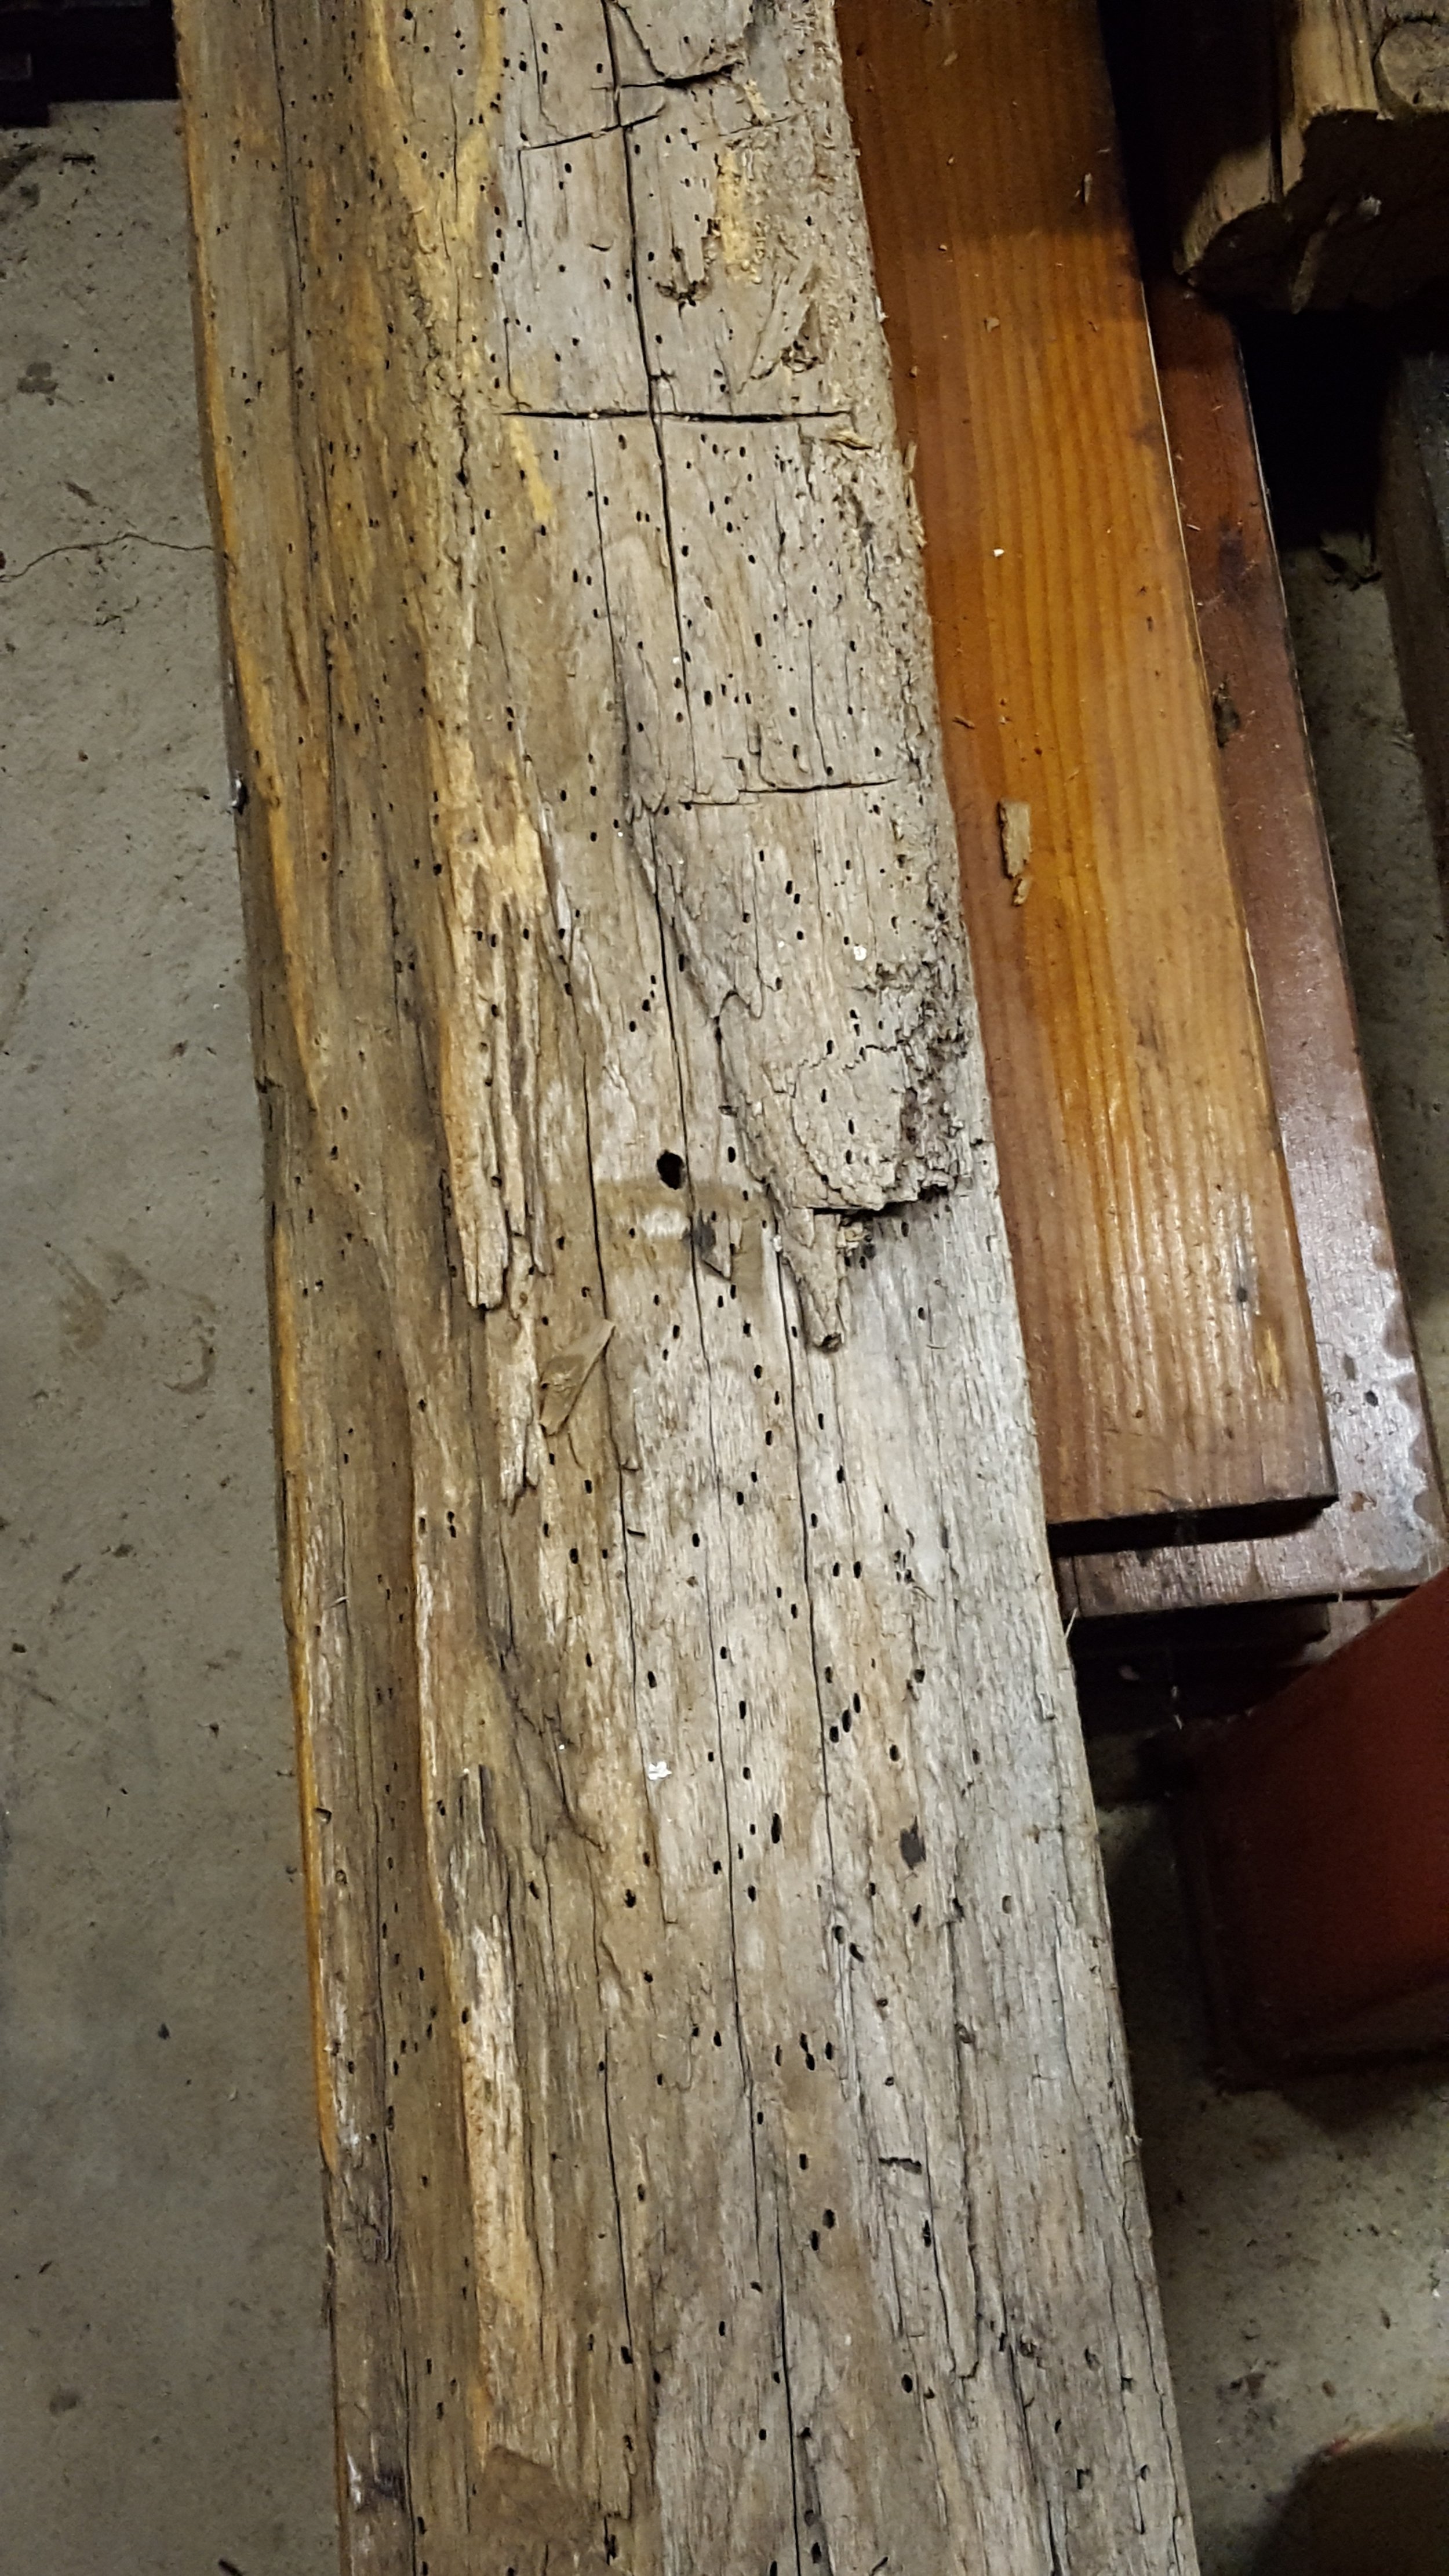
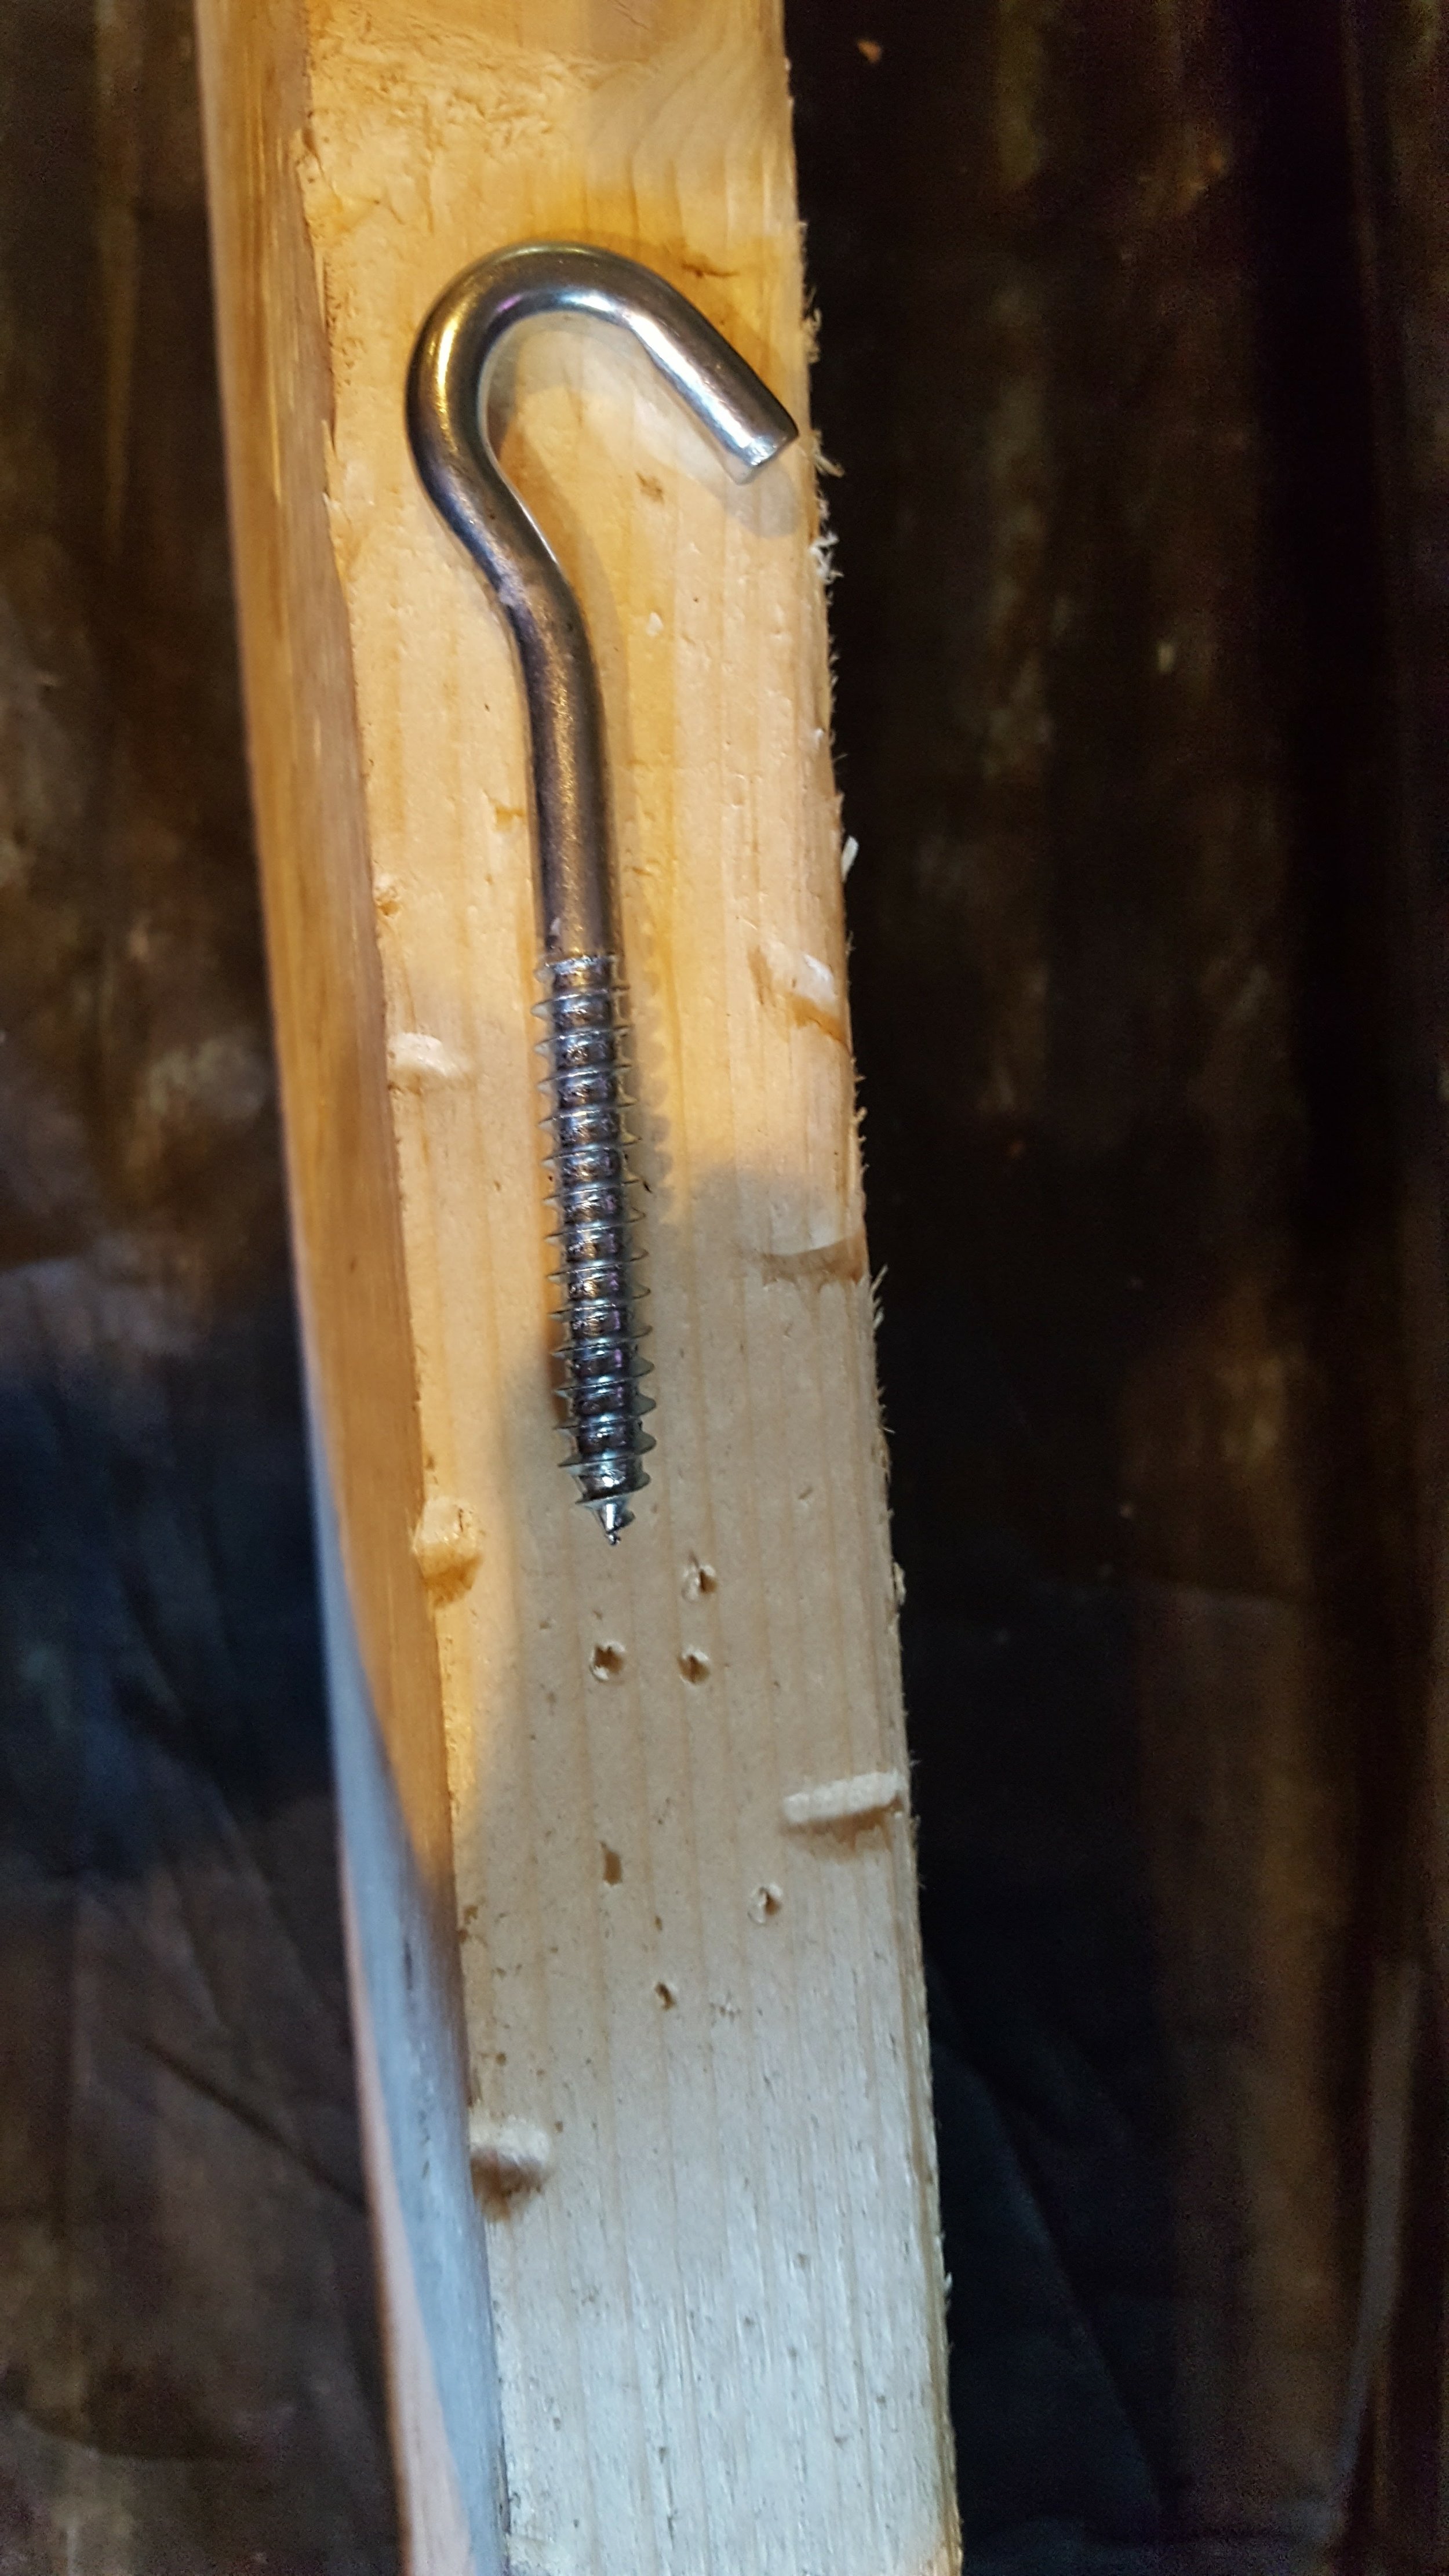
As you can see the beams are far from perfect. The wood has a lot of texture and cracks throughout. If you look close there are tiny holes covering the beam. These are the result of wood worms/larva. These little holes are a key detail when creating the barn beam look, or any old wood look. I used the ceiling hook screw to achieve this, it was very, very time consuming but I found it to work the best. I basically stabbed the wood all over and tried to create areas with large masses of holes.
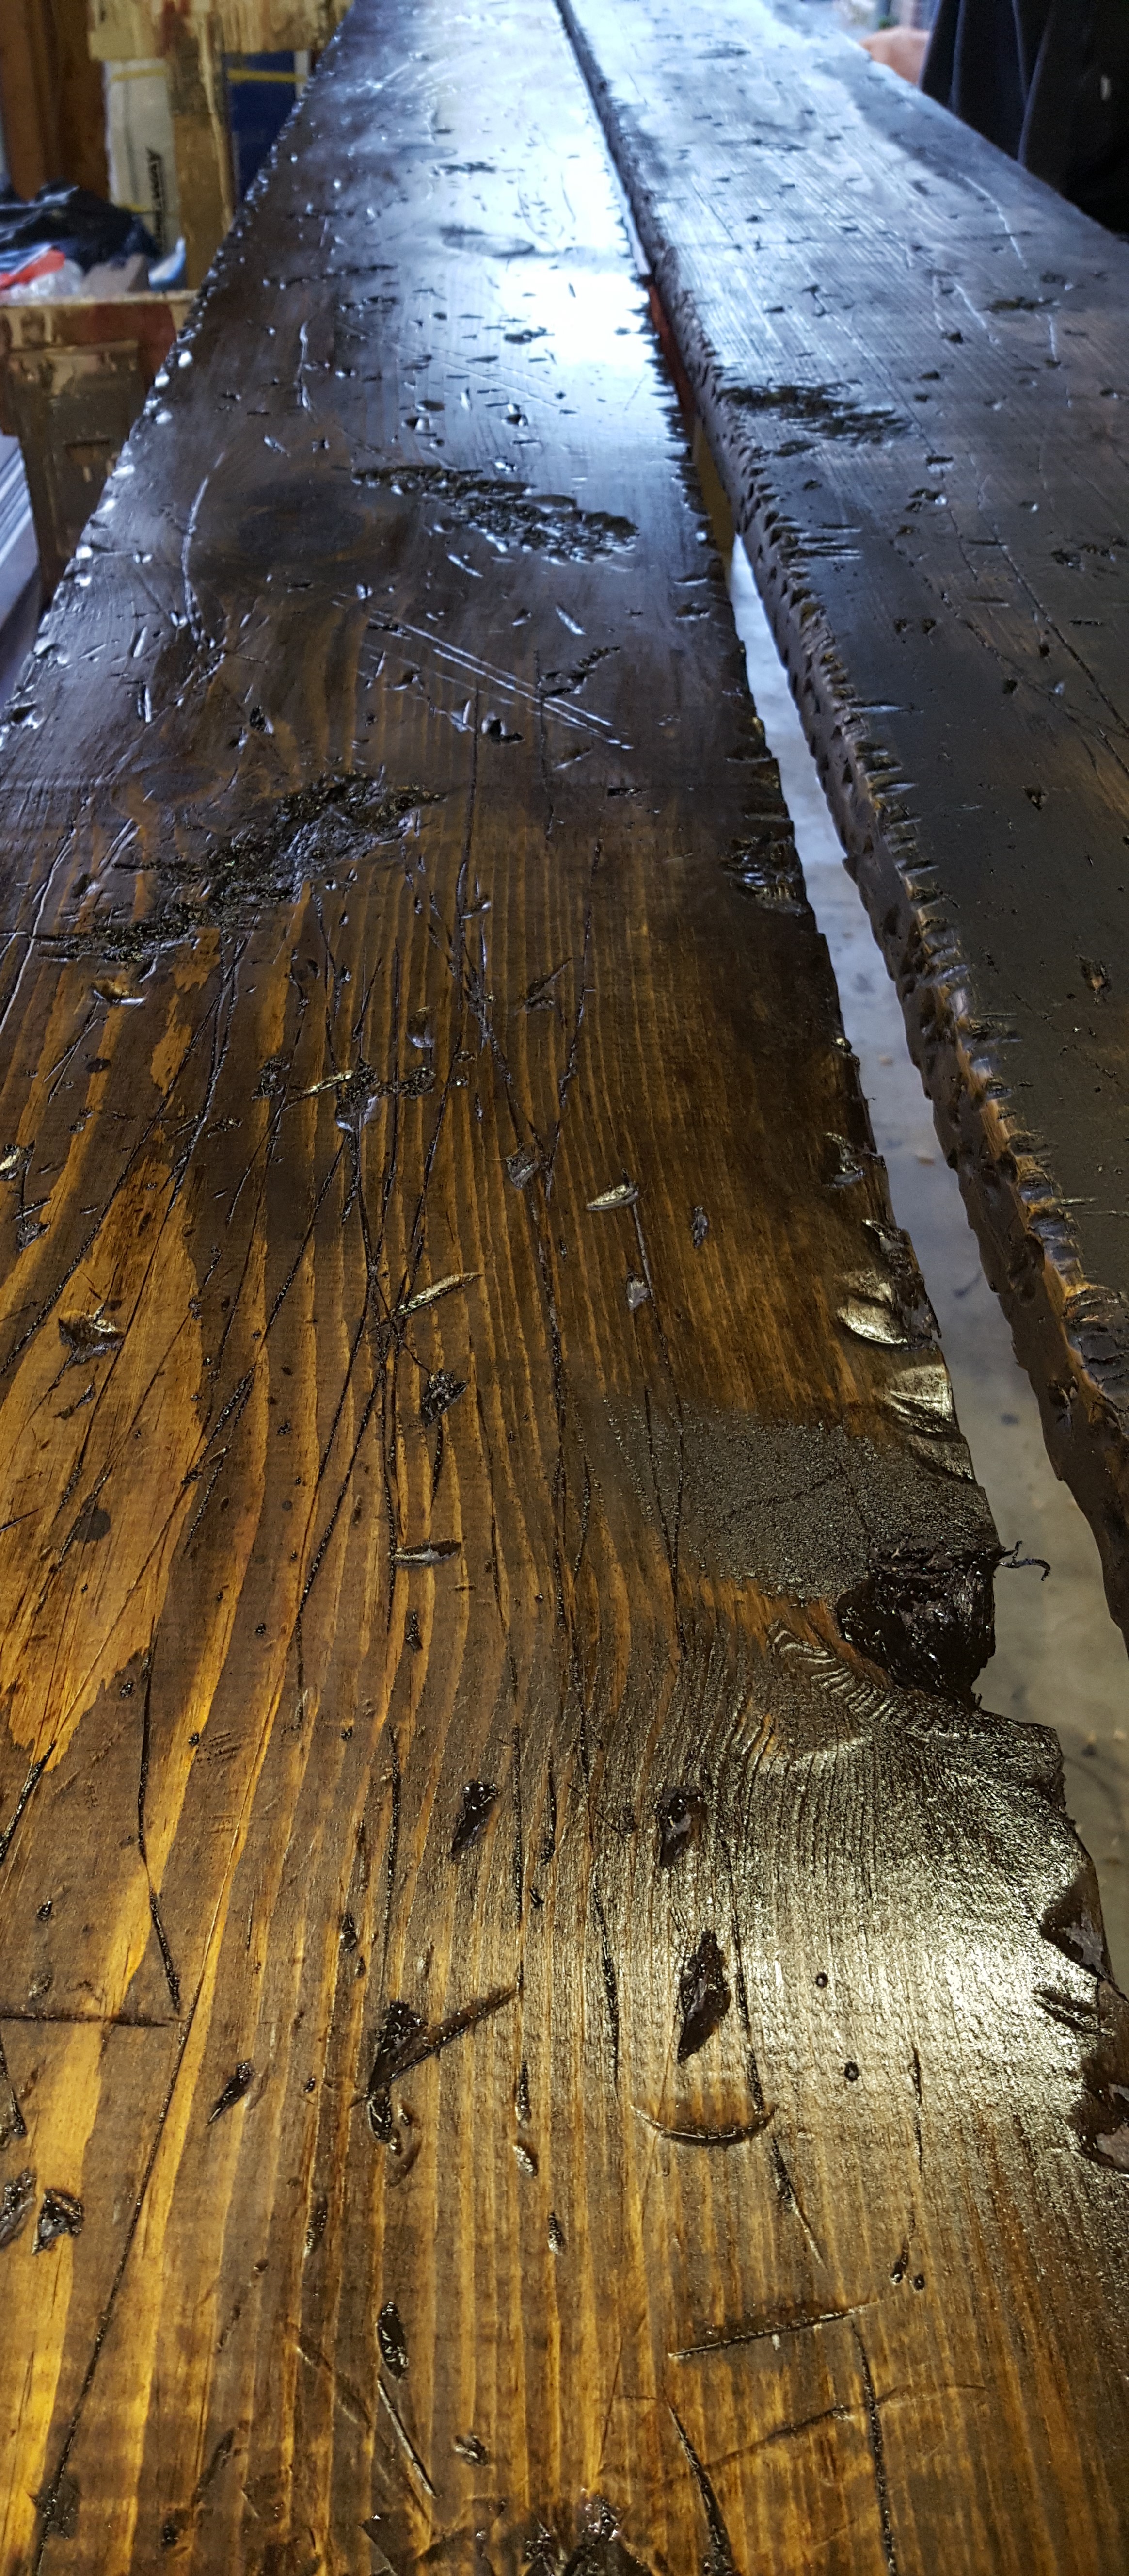
Next I used my screwdriver and stabbed it again, all over. I would sometimes stab it straight on and then at an angle. I made no pattern with this technique, I wanted to create random marks.

The hammer, this tool was by far the most effective of all the tools. The hammer can be used in many ways. I first hammered the wood like you wood normally. Then hammered at an angle throughout. I used the back of the hammer and basically hit the wood very hard to create holes. This wasn't enough distress, so I started to scrape the wood with the back of the hammer. This creates more texture and layering, which old beams have. I then hammered all the edges to soften and round it out, old wood is never square. Finally I used the back of the hammer to take out big chunks of wood and then hammered over them to soften them so they didn't look new.
Lastly I used the chain, which can be a little dangerous. The chain leaves soft dents that look natural and random.
After all of that hard labor, you probably need a drink and a breather. I enjoy a good vodka and locally made watermelon juice spritzer. When you're ready to get back to work, you will need a few cans of black spray paint.

So the purpose of the spray paint is to give the wood dark spots and age. What I do is start from one end of the board and and gently spray the board back and forth. When I see any holes or knots I spray inside of them to create depth. After I quickly spray the board I wipe any excess paint off the wood.

Now it's time to stain, I choose espresso as well as provincial, which will give a golden tone. What I did was stain the wood with espresso first and let it dry. I then sanded the wood, especially the edges and areas where I took chunks of wood out. This will make those areas look old and worn.
I then put another coat of espresso, and let it dry then sanded the wood again with a very fine sandpaper to smooth it out. After the stain dried I put a coat of the provincial stain to give some warmth and depth.

After a few days of drying, my contractor took the wood to my clients home and covered the header with it. The beam came out beautiful and you would never know it was a veneer and not an old barn beam. I'm in love with this look and it worked out perfectly for this cool nook in this Southern inspired man room.